Originally penned January 2009 and Updated July 1, 2015

There are a lot of subtleties in tweaking your photographs. Of course, the more you can get right in the camera, the better your image will ultimately be. It goes back to the trying to make a silk purse out of a sow’s ear. But with Camera Raw, Lightroom, and other tools, you can bring out the best in your photographs. Remember, what comes out of your camera does not usually totally reflect what you saw when you were attracted to the scene. Think of it as your negative from film days.
The Basics
Let’s start with a few basics. Lightroom is actually a very easy tool to use, and for those who do not want to go the extra route of layers and other more sophisticated imaging, it may see you through. Remember that Photoshop was created for graphic designers, while Lightroom was created by photographers for photographers. What a concept and what a BIG difference!
I am not going to do a complete how-to, as that can be found in tutorials, books, (see our Resources page) and our workshops. In installments, however, I’ll try to address common areas of confusion as well as give you some hints that I use in processing my own images. Even far more sophisticated users than I have found some of my hints quite useful. Just use this as a guide and develop what works for you. If you try something, make virtual copies (we’ll address this in a future blog) and see how they compare.
Triangles that Control Panels
First, however, I’d like to start with one important basic, and that is the little triangles that control the various panels. These are found at the center of each edge of your Lightroom window. If they are inward-facing and dotted (see below), hover over them, and you will see the panels appear; mouse away from them, and the panels will disappear again. Click on them, and and the triangle will turn solid and face outwards, while the panels will stay visible. This is the before and after way the triangle looks:

Dotted = temporary

solid=permanent and my default most of the time
Click on them again, and they will go back to hover mode. Try it, and you’ll see what I mean. When people lose their panels, it is usually because they have clicked on the triangle by mistake, not knowing what that does.
Top Panel
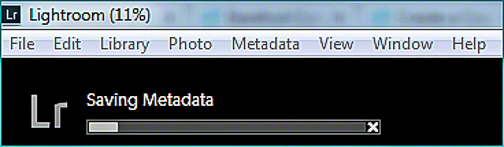
I prefer to keep the top panel open, as it will show you the status bar of a task such as saving, importing, exporting, creating a contact sheet, etc.
Bottom Panel
The bottom panel, the part with thumbnails and a black informational band above, is a matter of preference. I have seen lots of people on either side of this “door.” Some prefer to leave it visible, whilst others mouse over it when needed. (Remember the dotted/solid triangles above?)
Toolbar
The easy shortcut for this in any module is pressing the letter “t”. A gray band will appear at the bottom the “light table” and sometimes at the top, as well, if appropriate. You will see it in Library Module / Grid view, but not in Loupe view, because you can’t filter with only one image selected.

What is useful, I find, is to check off some of the items that appear when you click on the triangle in the gray band just below your light table and next to the Sync Settings and Sync Metadata buttons on the right. The word “Thumbnails” may or may not show up to the left of it, depending upon the module and view.
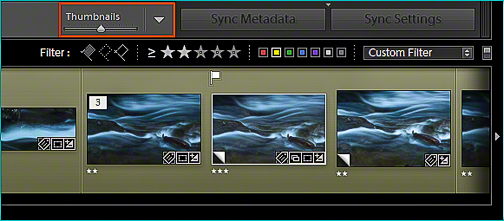
For Library Module / Grid view, I check View Modes, Painter, Sorting, Rating, Color Label, Flagging, and Thumbnail Size. You will have to add these one at a time. Some of these I implement through keystrokes, but I know I am in the minority here; most people are mousers. You may have different preferences, so add one item at a time and decide what works for you.
Lightroom Modules
As anyone can see, there are seven modules, but the ones people use most, and the ones that I’ll address first, are Library and Develop.
But for every module, there is under the Help menu, invaluable information under items [X] Module Tips, [X] Module Help, and [X] Module Shortcuts.
Library
Think of the Library module as your file cabinet. Quite simply, this is where you organize your files.
Library – Left Panel
In this panel, you import and export, remove, delete, or rename files, create collections of images from different folders that you can work on together without having to make extra copies of them, and several other tasks. That’s all on the left side of your window. If it’s not, check out that little triangle! With rare exceptions that I will not list here, nothing, and I mean nothing, should be done except from within Lightroom!
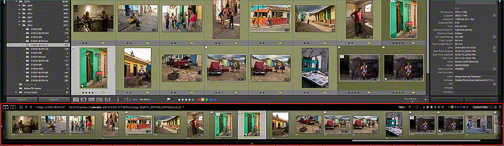
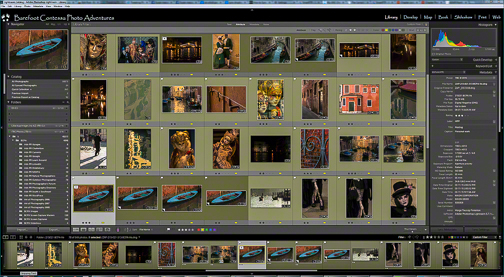
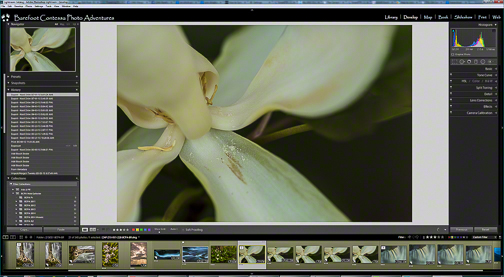
I find that newcomers get most confused when they import photographs in several stages as, for example, when they travel and download images daily. Lightroom defaults its viewing to Current (while importing) or Previous Import (when done importing), so some people panic when they see images from the last day but not from the previous two days. What you see in the screen shot below includes imported screen shots taken from Lightroom that I just did for this blog update.
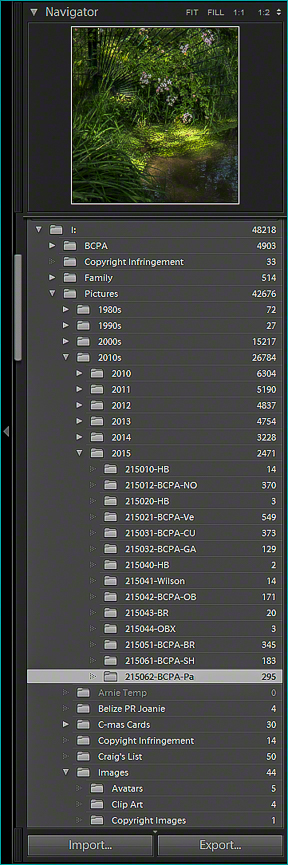
On the left, just scroll down to the appropriate folder, and ta-daaa, they are all there. Or, right click on one of the images and select Go to Folder in Library.
It should be repeated here that Lightroom is a like a browser. What you import into Lightroom are the thumbnails, any camera metadata (camera information such as lens, focal point, aperture, shutter speed, etc.), and the ability to tweak your images that are imported. I addressed this more fully in an earlier article on Digital Asset Management– see Part II under the Lightroom section.
Library – Right Panel
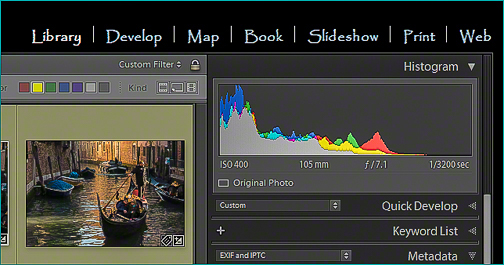
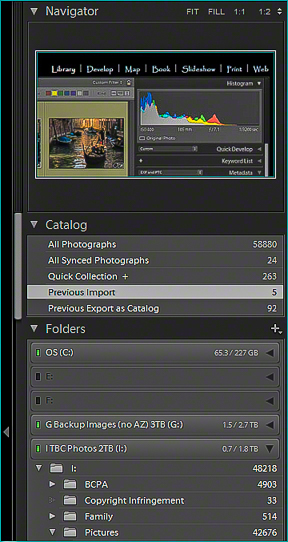
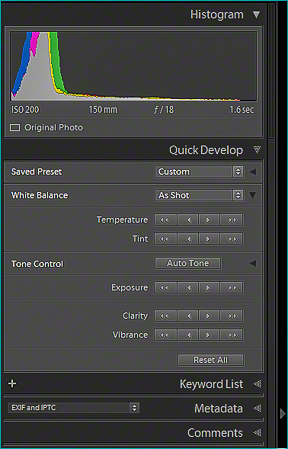
On the right side of your window, you’ll see the histogram, a Quick Develop mode that I find useful for quick basic adjustments, as well as the metadata information. Remember that metadata not only has camera shooting data, but your copyright information, descriptions, keywords, and a host of other labels. This is where you can and should fill in all this information. I have foreshortened it to save space.
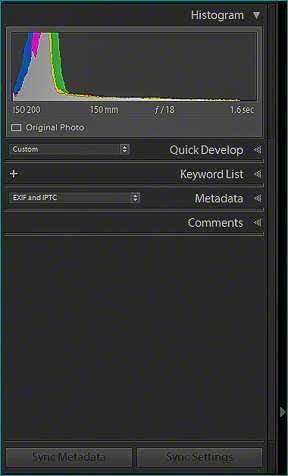
Open up the sections with the little triangle (facing in is closed, facing down is open), and you will see these:
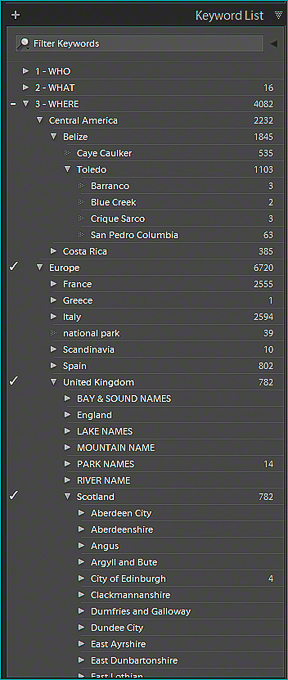 I use a hierarchical list instead of keywords, as it helps both maintain consistency and avoid typos and other errors.

Develop Module
The Develop module is your digital darkroom. It has come a long way, baby, since Lightroom was first launched. Each iteration produces more capabilities. The thing I like best about the Develop module is that I can do spot corrections, vignetting, and a host of other tweaks without having to save the image as a TIF or PSD file. You can also do this in Photoshop’s Camera Raw, but exporting in Camera Raw, one has to do it in two stages, first open it in Photoshop, then export it. In Lightroom, however, you can do it directly in whatever size and resolution and sharpening mode that you want. Beautiful! Another BIG difference from Camera Raw — you can export the file or print it in the exact size and resolution in one step.
Develop – Left Panel
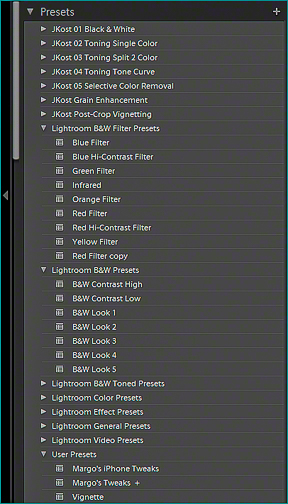
The basic layout looks similar to the Library module, but in the left panel, there are some great Presets (you can also create your own), a Snapshot feature if you want to keep track of how your image looked at any step in the development process, and your History of each step you did to process an image. By mousing over each step of the way, you can see the result in the Navigator, as long, of course, as you use the Navigator feature.
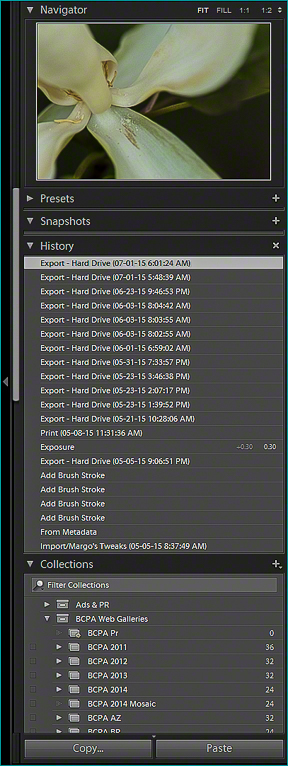
Lightroom has included a plethora of presets, and those who attend our workshops get Margo’s Tweaks, as well.
Develop – Right Panel
The bulk of the tools available to you is gathered in the right panel. Scroll down and familiarize yourself with them. Generally, when working on an image, it is preferable to work in each section, top to bottom, before going on to the next. This is not to say that you can’t jump back and forth, but Lightroom was designed for a logical work flow.
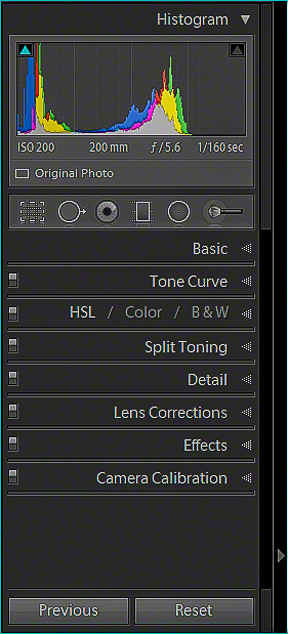 As with some other screenshots, I foreshortened it to save space.
Meanwhile, we hope to see many of you at our workshops this year. We already have quite a few sign-ups, including a good number of our alumni/ae. There are several discounts available. For more information, go to our Barefoot Contessa Photo Adventures website, and if you are considering joining us, do as others have already done … make your room reservations. You can always cancel later if necessary!
We love getting comments from you (please post below). Remember, you don’t need to be a Google member to do so. Just click on the “comments” link below and post anonymously.
If you wish to get notices when new articles are posted, look below this article and click on/in the appropriate box. Even if you choose not to do that, please share this blog and our website with your friends and relatives who love photography.
If you enjoy our blog(s) …
Please SUBSCRIBE. It’s easy to do by clicking on the appropriate link at the top of the right column.
Comments on the blog are always encouraged and welcome.
We also hope you will LIKE this and SHARE this blog with those interested in photography by clicking on the buttons below. We also hope you will check out these links: